- Published on
Homelab Networking: From ToDesk to FRP
- Authors

- Name
- Shuqi Wang
For a long time, I envied people who could type one command and instantly reach a machine sitting somewhere else:
ssh homelab
It felt like a small superpower. No remote-desktop UI, no QR code, no "your free session has ended" popup. Just a terminal prompt on the machine I wanted.
To achieve that convenience for my own homelab, I went through quite a few tools, and to be honest, it was a bit of a struggle.
The Trial and Error
- ToDesk / TeamViewer: This was my starting point. They worked, but the free tiers felt restrictive, and I did not like depending on a heavy GUI tool just to reach my own machine.
- Tailscale: Everyone recommends it, and for good reason. It is excellent technology. On my specific setup, though, I kept hitting latency spikes and conflicts with other proxy tools I was running.
- Cloudflare Tunnels: Very easy to set up, but I experienced enough random disconnects that it did not feel like something I wanted to depend on for serious work.
Eventually, I went with the more manual route: FRP (Fast Reverse Proxy).
The idea is simple: rent a cheap VPS with a public IP, then keep a persistent tunnel from my private homelab machine to that VPS. When I want to connect from outside, I connect to the VPS, and FRP forwards the traffic back through the existing tunnel.
It is a little more work than clicking "connect," but the result feels cleaner and more controllable.
The Concept
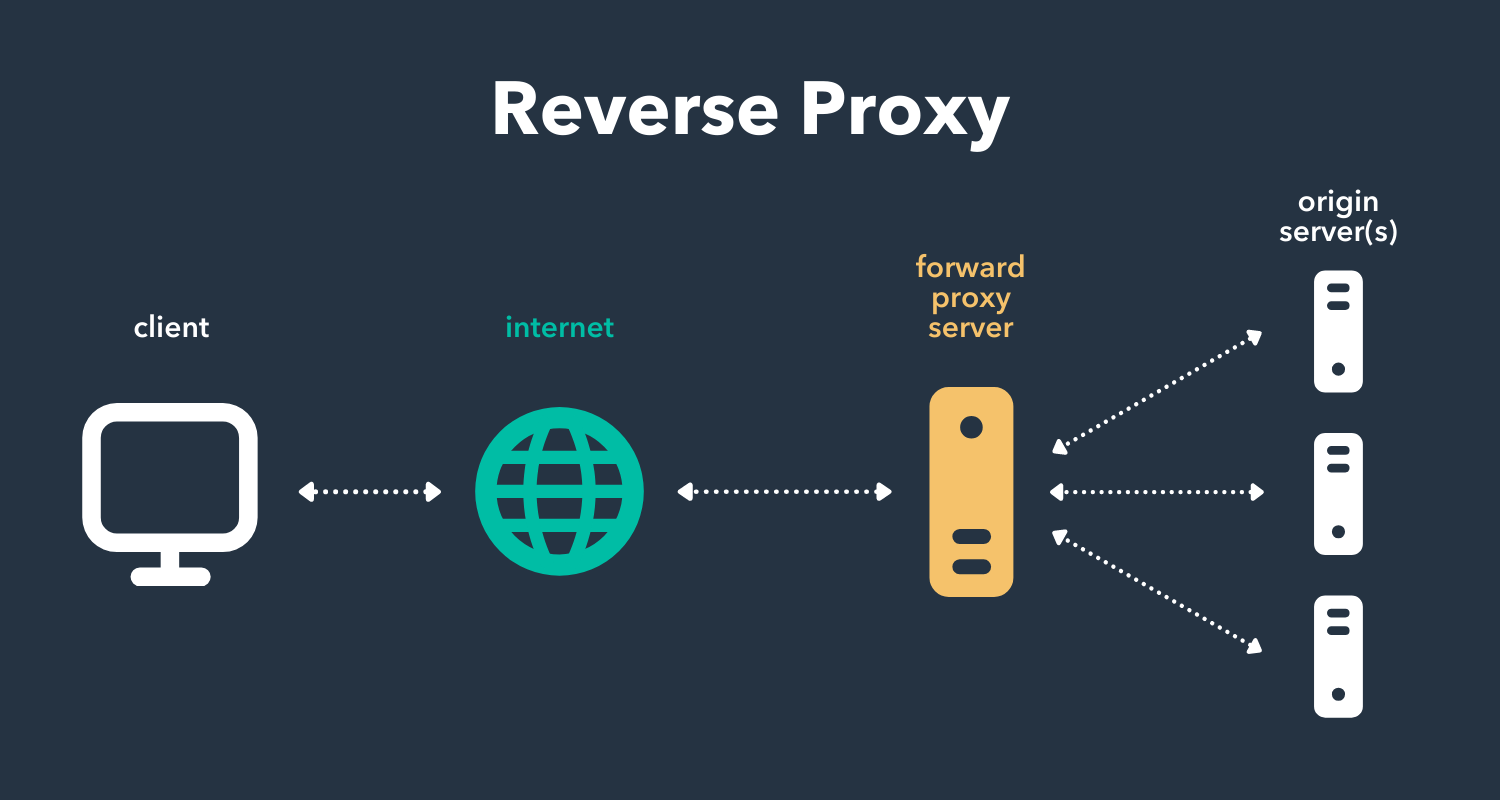
FRP architecture: the homelab keeps an outbound tunnel to a public VPS.
My homelab machine sits behind NAT and has no public IP. The VPS has one.
I run:
frpson the VPS,frpcon my homelab machine.
frpc dials out to frps and keeps that connection alive. Later, when I SSH to a port on the VPS, frps forwards the traffic through the tunnel to the private machine at home.
1. The Middleman: VPS Setup
I used a cheap Ubuntu VPS. It does not need much CPU or memory. For this use case, network stability matters more than raw performance.
Install frps from the FRP releases page:
wget https://github.com/fatedier/frp/releases/download/v0.51.3/frp_0.51.3_linux_amd64.tar.gz
tar -zxvf frp_0.51.3_linux_amd64.tar.gz
The configuration file frps.toml is minimal. I just need to specify a bindPort where the server will listen for clients:
# frps.toml
bindPort = 7000
To keep it running after I disconnect, I use a systemd service:
# /etc/systemd/system/frps.service
[Unit]
Description=frps service
After=network.target

[Service]
Type=simple
ExecStart=/path/to/frps -c /path/to/frps.toml
Restart=always
RestartSec=5

[Install]
WantedBy=multi-user.target
Then enable and start it:
sudo systemctl enable --now frps
2. The Target: Homelab Windows PC
On my Windows PC at home, I downloaded the Windows version of frpc.
I mapped my local SSH port (22) to a port on the VPS (6000).
serverAddr = "vps.example.com"
serverPort = 7000

[[proxies]]
name = "ssh-home"
type = "tcp"
localIP = "127.0.0.1"
localPort = 22
remotePort = 6000
I did not want to manually run frpc every time the machine rebooted, so I used WinSW to wrap it as a Windows Service. That lets it start quietly in the background.
The important practical lesson: treat the tunnel as infrastructure. If it only works when a terminal window is open, it will fail exactly when I need it.
3. The Connection: My Laptop
Technically, I can now connect with:
ssh user@vps.example.com -p 6000
But to make it feel like the "superpower" I wanted, I added an alias to ~/.ssh/config:
Host homelab
    HostName vps.example.com
    Port 6000
    User my_windows_user
Now, no matter where I am, I just type ssh homelab and I'm in.
A Note on WSL
Since I do most development in WSL, I actually run a second frpc instance inside WSL and map it to a different remote port. This treats my WSL environment as a separate target, which is cleaner than routing everything through Windows.
For example:
[[proxies]]
name = "ssh-wsl"
type = "tcp"
localIP = "127.0.0.1"
localPort = 22
remotePort = 6001
Then my SSH config can expose both:
Host homelab
    HostName vps.example.com
    Port 6000
    User my_windows_user

Host homelab-wsl
    HostName vps.example.com
    Port 6001
    User my_wsl_user
Security Notes I Should Not Skip
FRP is convenient, but it also creates a public entry point. A few things are worth doing before pretending the setup is "done":
- Use SSH keys, not passwords.
- Disable password login on the SSH server if possible.
- Keep FRP updated.
- Restrict exposed ports to only what I actually need.
- Use a strong FRP auth token.
- Check VPS firewall rules.
- Watch logs after first deployment.
In other words, the goal is not "make my private machine public." The goal is "create one narrow, auditable path back home."
Closing Thought
This was a weekend project, but it changed how my homelab feels. Instead of a computer trapped behind a home router, it became part of my normal working environment.
There is something satisfying about typing ssh homelab from a cafe and landing exactly where I meant to be.